


-
Table of Contents
Sparkle Your Creations: Elevate Resin Molds and Scrapbooks with Heart-Shaped Glitter!
Transform your crafts with heart-shaped glitter! Discover how to use it in resin molds and scrapbooks to add a touch of sparkle and love to your projects. Don’t miss out on creating stunning pieces—get your heart-shaped glitter today! [Shop now!](https://www.glittersmall.com/heart-glitter/)
Introduction
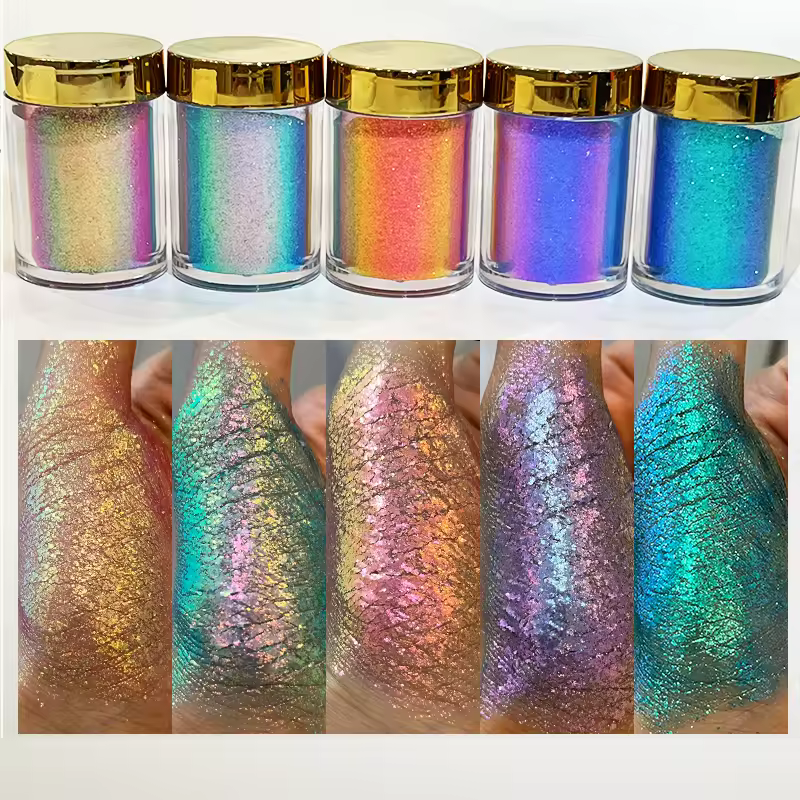
Heart-shaped glitter adds a charming and whimsical touch to resin projects and scrapbooks. Whether you’re creating personalized gifts, decorative items, or enhancing your scrapbook pages, incorporating this glitter can elevate your designs. To effectively use heart-shaped glitter in resin molds, ensure you mix it evenly into the resin before pouring, allowing for a uniform distribution of sparkle. In scrapbooking, sprinkle the glitter onto adhesive areas or use it to accentuate specific elements, creating a visually appealing layout. With the right techniques, heart-shaped glitter can transform your creative projects into eye-catching masterpieces.
Creative Ways to Incorporate Heart Glitter in Resin Molds
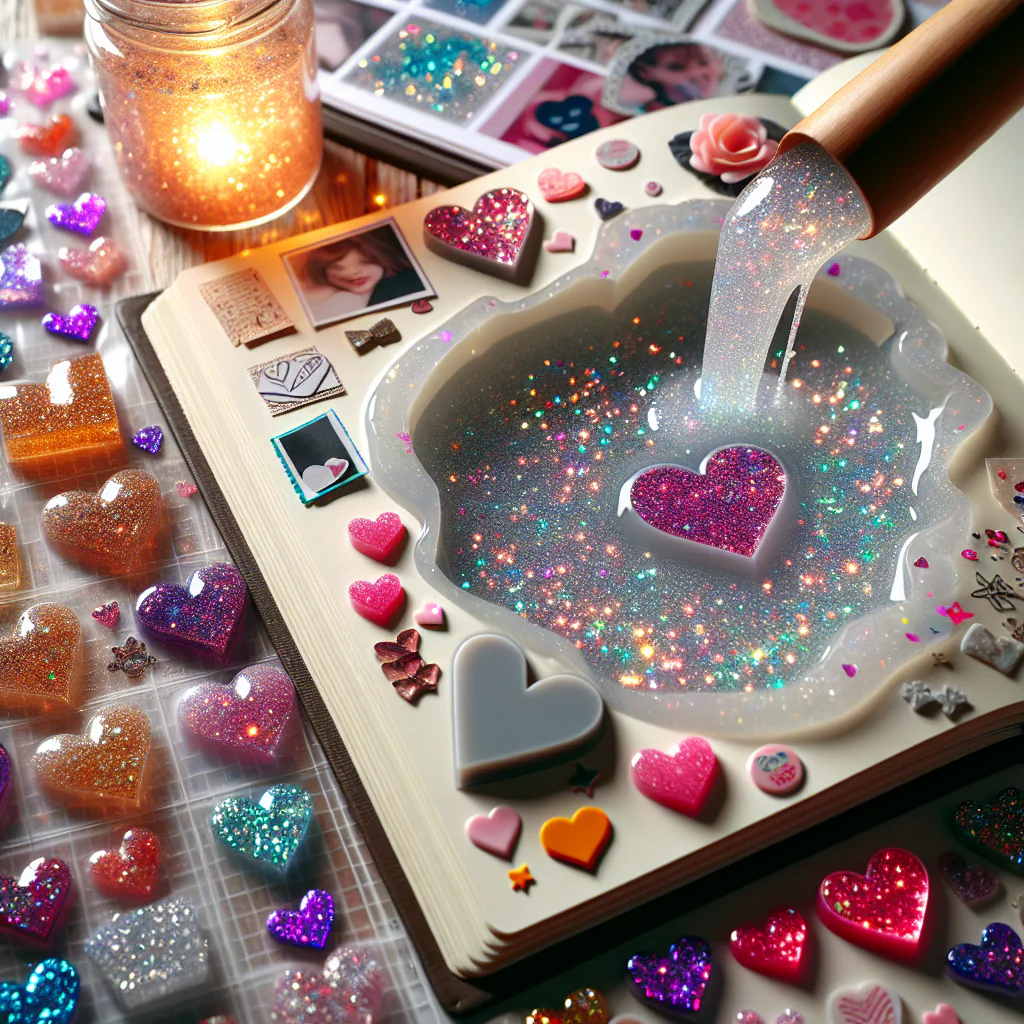
Heart-shaped glitter is a delightful embellishment that can elevate various creative projects, particularly when used in resin molds and scrapbooks. Its charming shape and vibrant colors can add a touch of whimsy and romance, making it an ideal choice for a range of applications. To effectively incorporate heart-shaped glitter into resin molds, one must first understand the properties of resin and how glitter interacts with it. Resin, a versatile medium, can be poured into molds to create stunning, durable pieces. When adding heart-shaped glitter, it is essential to consider the timing of the addition. Typically, glitter should be mixed into the resin before pouring it into the mold. This ensures an even distribution throughout the piece, allowing the glitter to catch the light beautifully once cured.
To begin, prepare your workspace by gathering all necessary materials, including resin, heart-shaped glitter, a mixing cup, a stir stick, and the mold itself. It is advisable to wear gloves and work in a well-ventilated area, as resin can emit fumes during the curing process. Once your workspace is ready, measure the appropriate amount of resin according to the instructions provided by the manufacturer. After mixing the resin thoroughly, you can gradually add the heart-shaped glitter. The amount of glitter you choose to incorporate will depend on the desired effect; a small amount can create a subtle shimmer, while a generous handful can result in a more vibrant and eye-catching piece.
After mixing the glitter into the resin, pour the mixture into the mold carefully. To achieve a layered effect, consider pouring a small amount of resin first, allowing it to partially cure before adding more resin mixed with glitter. This technique can create depth and dimension, enhancing the overall aesthetic of the finished piece. Additionally, you may want to experiment with different colors of heart-shaped glitter to create unique combinations that reflect personal style or thematic elements. For instance, using red and pink glitter can evoke a romantic feel, while multicolored glitter can add a playful touch.
Once the resin has cured completely, demold your creation and admire the results. The heart-shaped glitter should be suspended beautifully within the resin, creating a stunning visual effect. If desired, you can further embellish your piece with additional decorations, such as paint or stickers, to enhance its charm. This versatility makes heart-shaped glitter an excellent choice for various projects, from jewelry to home decor.
In addition to resin molds, heart-shaped glitter can also be effectively utilized in scrapbooking. When incorporating glitter into scrapbook pages, consider using it to accentuate specific elements, such as photographs or journaling. A simple yet effective technique involves applying adhesive to the desired area and then sprinkling heart-shaped glitter over it. This method not only adds texture but also draws attention to important details within the layout. Furthermore, layering different colors of glitter can create a visually appealing contrast, making your scrapbook pages more dynamic.
In conclusion, heart-shaped glitter serves as a versatile and enchanting embellishment for both resin molds and scrapbooks. By understanding how to effectively incorporate it into your projects, you can create stunning pieces that reflect your creativity and personal style. Whether you are crafting a unique resin piece or enhancing a scrapbook page, heart-shaped glitter can undoubtedly add a touch of magic to your artistic endeavors.
Tips for Using Heart Glitter in Scrapbooking Projects
Incorporating heart-shaped glitter into scrapbooking projects can elevate the aesthetic appeal of your creations, adding a touch of whimsy and romance. To effectively utilize this sparkling embellishment, it is essential to consider a few key tips that will enhance both the visual impact and the overall quality of your scrapbook pages. First and foremost, selecting the right type of heart-shaped glitter is crucial. Glitter comes in various sizes and finishes, ranging from fine to chunky, and choosing the appropriate size can significantly influence the final look of your project. For instance, fine glitter can create a subtle shimmer, while larger pieces can serve as bold focal points.
Once you have selected your glitter, the next step involves determining how to adhere it to your scrapbook pages. A reliable adhesive is essential for ensuring that the glitter stays in place over time. Liquid glue, double-sided tape, or glue dots can all be effective options, but it is advisable to use a clear-drying adhesive to maintain the integrity of your design. When applying the adhesive, consider using a small paintbrush or a fine-tip applicator to control the amount of glue and to create intricate designs. This precision allows for more creativity, enabling you to outline shapes or create patterns that complement your photographs and other embellishments.
Moreover, it is beneficial to work in a well-prepared workspace to minimize mess and maximize efficiency. Before you begin, lay down a protective covering, such as newspaper or a craft mat, to catch any stray glitter. This not only keeps your workspace tidy but also allows for easy cleanup. Additionally, consider using a tray or a shallow box to contain the glitter during application. This method prevents spillage and makes it easier to pour excess glitter back into its container, thus reducing waste.
As you incorporate heart-shaped glitter into your scrapbook pages, think about the overall theme and color scheme of your project. Harmonizing the glitter with other elements, such as patterned paper, stickers, and photographs, can create a cohesive look. For example, if your scrapbook page features a romantic theme, pairing pink or red Heart Glitter with soft pastel colors can enhance the emotional tone of the layout. Conversely, if you are working on a more vibrant project, opt for bold colors that will stand out against the background.
In addition to using heart-shaped glitter as a decorative element, consider integrating it into mixed media techniques. For instance, you can sprinkle glitter over wet paint or use it in conjunction with embossing powder to create textured effects. This approach not only adds dimension to your pages but also allows for greater artistic expression. Furthermore, layering glitter with other materials, such as washi tape or fabric, can create unique visual contrasts that draw the eye.
Finally, remember to allow adequate drying time for any adhesive or mixed media techniques you employ. Rushing this process can lead to smudging or uneven application, detracting from the overall quality of your scrapbook page. By taking the time to carefully plan and execute your design, you can ensure that your use of heart-shaped glitter enhances your scrapbook projects, making them not only visually appealing but also cherished keepsakes that capture special memories. In conclusion, with thoughtful selection, careful application, and creative integration, heart-shaped glitter can transform your scrapbooking endeavors into stunning works of art.
Step-by-Step Guide to Mixing Heart Glitter with Resin
Using heart-shaped glitter in resin molds and scrapbooks can elevate your crafting projects, adding a touch of whimsy and charm. To achieve the best results, it is essential to follow a systematic approach when mixing Heart Glitter with resin. This step-by-step guide will provide you with the necessary instructions to ensure a successful crafting experience.
To begin, gather all the materials you will need for the project. This includes resin, hardener, heart-shaped glitter, mixing cups, stirring sticks, and your chosen mold. It is crucial to work in a well-ventilated area, as resin can emit fumes that may be harmful if inhaled in large quantities. Once you have your workspace prepared, you can proceed to the next step.
The first step in the process is to measure the resin and hardener accurately. Most resin products come with specific mixing ratios, typically ranging from 1:1 to 2:1. It is vital to adhere to these guidelines to ensure proper curing. Using a measuring cup, pour the appropriate amount of resin into a mixing cup, followed by the hardener. After adding both components, use a stirring stick to mix them thoroughly. It is important to scrape the sides and bottom of the cup to ensure that the resin and hardener are fully combined. This mixing process usually takes about three to five minutes, and you should aim for a clear, uniform mixture without bubbles.
Once the resin and hardener are well mixed, you can introduce the heart-shaped glitter. The amount of glitter you choose to add will depend on your personal preference and the desired effect. A general guideline is to start with a small amount, such as one to two teaspoons, and gradually increase it if you wish to achieve a more glittery finish. Gently fold the glitter into the resin mixture, ensuring that it is evenly distributed throughout. This step is crucial, as it will determine how the glitter appears in the final product.
After incorporating the glitter, it is time to pour the resin mixture into your mold. Carefully pour the resin into the mold, taking care to avoid creating air bubbles. If bubbles do form, you can use a toothpick or a heat gun to gently pop them. As you pour, you may want to tilt the mold slightly to help the resin flow into all corners, ensuring an even distribution of glitter throughout the piece. Once the mold is filled, allow the resin to cure according to the manufacturer’s instructions, which typically ranges from 24 to 72 hours.
While waiting for the resin to cure, it is advisable to keep the mold in a dust-free environment to prevent any debris from settling on the surface. After the curing period is complete, you can carefully demold your creation. Gently flex the mold to release the resin piece, taking care not to apply too much pressure, which could cause damage.
Finally, once your heart-shaped glitter resin piece is removed from the mold, you can use it in various ways. Whether you choose to incorporate it into a scrapbook, use it as a decorative element, or gift it to someone special, the possibilities are endless. By following these steps, you can successfully mix heart-shaped glitter with resin, creating beautiful and unique pieces that showcase your creativity and craftsmanship.
Q&A
1. **How do I incorporate heart-shaped glitter into resin molds?**
To use heart-shaped glitter in resin molds, first mix your resin according to the manufacturer’s instructions. Once the resin is mixed, add the heart-shaped glitter and stir gently to distribute it evenly. Pour the mixture into the mold and allow it to cure as directed.
2. **Can I use heart-shaped glitter in scrapbooking?**
Yes, heart-shaped glitter can be used in scrapbooking by applying adhesive to the desired area on your scrapbook page and then sprinkling the glitter over it. Allow the adhesive to dry completely to secure the glitter in place.
3. **What type of resin works best with heart-shaped glitter?**
Epoxy resin is typically the best choice for incorporating heart-shaped glitter, as it provides a clear finish and allows the glitter to shine through. Make sure to choose a resin that is compatible with your project and follow the curing instructions for optimal results.
Conclusion
To effectively use heart-shaped glitter in resin molds and scrapbooks, first ensure that the glitter is compatible with resin to prevent any adverse reactions. For resin molds, mix the glitter into the resin before pouring it into the mold for an even distribution, or sprinkle it on top for a layered effect. In scrapbooking, adhere the glitter using glue or double-sided tape to create decorative accents. Always allow sufficient drying time for both resin and glue to achieve a polished finish. Ultimately, heart-shaped glitter adds a charming touch to both resin projects and scrapbook pages, enhancing their visual appeal.