

Fine or Chunky? Choosing the Sparkle Your Surface Can Carry
The useful difference between fine and chunky glitter is not simply subtle versus bold. It is the amount of coverage, surface build and finishing work the project can carry.

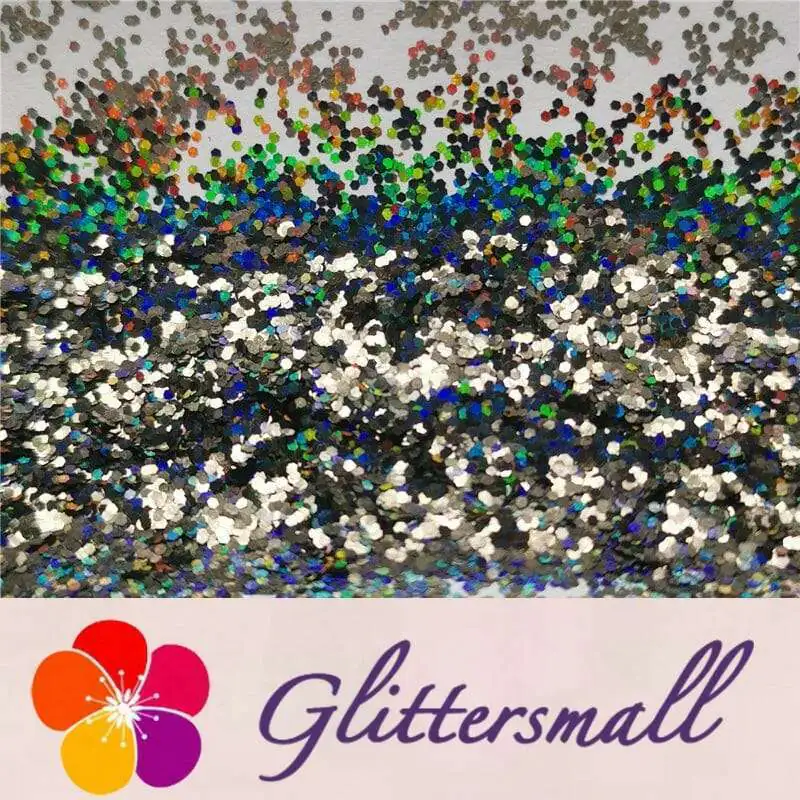
Fine and chunky are not simply quiet and loud versions of the same material. Fine glitter closes visual gaps and follows small details. Chunky glitter creates larger flashes, but it also creates more relief, needs more space and may require a thicker clear layer.
The short answer: Choose the largest particle the surface and finishing schedule can carry, then use smaller particles only where coverage needs help.
What needs to be decided before you shop
Start with the object that must be made. Record coverage per layer, surface build, viewing distance, placement control, and sealing and sanding time. These are not administrative details. They determine whether the loose material can produce the required finish without adding avoidable labor or risk.
- Coverage per layer: write down the actual production condition, not an idealized description.
- Surface build: write down the actual production condition, not an idealized description.
- Viewing distance: write down the actual production condition, not an idealized description.
- Placement control: write down the actual production condition, not an idealized description.
- Sealing and sanding time: write down the actual production condition, not an idealized description.
This brief also gives a supplier something concrete to answer. “I need fine vs chunky glitter” invites a broad catalog response. A brief that names the medium, size range, finish, quantity and use condition can be matched to a specific product code and sample.
Surface build affects labor
A large particle can protrude through a thin clear coat. Tumblers, coated panels and resin pieces may need additional sealing, leveling or sanding when chunky glitter is used.
When testing fine vs chunky glitter, hold coverage per layer steady while changing only the feature discussed here. Use the same base, measured amount and application tool. A sample that changes particle size and finish at once may look dramatic, but it cannot show which change caused the result.
Read this fine vs chunky glitter sample at its normal viewing distance. Close inspection reveals edge profile and distribution; a longer view shows whether the chosen surface build reads as a continuous field, distinct flashes or almost no sparkle. Those views answer different questions, so record both.
The binder changes the choice
A viscous medium may hold large particles where a thin liquid does not. Always test the selected glitter in the actual resin, paint, gel or adhesive.
For fine vs chunky glitter, surface build belongs in the visual decision. Larger or thicker particles may demand more material above them, while a finer surface build can create dense coverage quickly. Extra clear coat, sanding, sorting or hand placement belongs in this article’s cost calculation even when the glitter itself is inexpensive.
If this fine vs chunky glitter project needs both coverage and visible points of light, compare a controlled mixed-size sample with the single-size option. Small particles can close gaps while larger particles remain legible against the chosen viewing distance. Record the ratio; an attractive unmeasured blend will not support a repeat order.
Mixed size is a design tool
A blend uses small particles to fill gaps while large cuts create flashes. It is useful when a single-size layer looks either too flat or too sparse.
A product photograph cannot reliably show how viewing distance interacts with placement control. Cameras compress highlights, screens shift color and studio lighting usually favors sparkle. Make a fine vs chunky glitter sample over the intended base and inspect it under the light that matters to the buyer or end user.
Compatibility in this fine vs chunky glitter decision needs a complete cure or dry cycle. Immediate color is not enough. Look for migration, loss of reflective finish, clouding, uneven orientation and any change connected to sealing and sanding time.
Build a sample that answers a real question
A useful fine vs chunky glitter test is small, controlled and easy to compare. Use the actual base color and the same resin, paint, gel or adhesive planned for production. Prepare one control and change only one variable at a time: particle size, finish, loading or placement. Label every sample before mixing; similar effects become surprisingly difficult to identify once several panels are on the bench.
For repeat fine vs chunky glitter work, turn the approved sample into a compact specification. Keep the product code beside coverage per layer, surface build, viewing distance, placement control, sealing and sanding time. A color name or photograph can help someone browse, but neither should become the repeat-order reference.
Reopen this approval whenever coverage per layer or sealing and sanding time changes. The previous sample remains useful evidence for the recorded system; it is not proof that a new resin, coating, cosmetic base, adhesive or contact condition will behave the same way.
How the variables behave together
Specifications are often reviewed one line at a time, but the finished result is produced by interactions. A change in coverage per layer can alter the importance of surface build; a change in viewing distance may add work at the stage where placement control is controlled. The following review is deliberately connected rather than a list of isolated definitions.
Coverage per layer
Treat coverage per layer as a working condition, not a catalog adjective. Put a measurable or observable value beside it wherever possible, then compare it with surface build. If those two entries conflict, solve the conflict in a sample before adding more color or effect choices.
The fine vs chunky glitter acceptance note should describe what happened in the finished piece: how the material covered, where reflections appeared, what the surface felt like and how much correction was needed. Link that note to viewing distance, because a visually acceptable result can still be impractical when the neighboring production condition changes.
Surface build
Treat surface build as a working condition, not a catalog adjective. Put a measurable or observable value beside it wherever possible, then compare it with viewing distance. If those two entries conflict, solve the conflict in a sample before adding more color or effect choices.
The fine vs chunky glitter acceptance note should describe what happened in the finished piece: how the material covered, where reflections appeared, what the surface felt like and how much correction was needed. Link that note to placement control, because a visually acceptable result can still be impractical when the neighboring production condition changes.
Viewing distance
Treat viewing distance as a working condition, not a catalog adjective. Put a measurable or observable value beside it wherever possible, then compare it with placement control. If those two entries conflict, solve the conflict in a sample before adding more color or effect choices.
The fine vs chunky glitter acceptance note should describe what happened in the finished piece: how the material covered, where reflections appeared, what the surface felt like and how much correction was needed. Link that note to sealing and sanding time, because a visually acceptable result can still be impractical when the neighboring production condition changes.
Placement control
Treat placement control as a working condition, not a catalog adjective. Put a measurable or observable value beside it wherever possible, then compare it with sealing and sanding time. If those two entries conflict, solve the conflict in a sample before adding more color or effect choices.
The fine vs chunky glitter acceptance note should describe what happened in the finished piece: how the material covered, where reflections appeared, what the surface felt like and how much correction was needed. Link that note to coverage per layer, because a visually acceptable result can still be impractical when the neighboring production condition changes.
Sealing and sanding time
Treat sealing and sanding time as a working condition, not a catalog adjective. Put a measurable or observable value beside it wherever possible, then compare it with coverage per layer. If those two entries conflict, solve the conflict in a sample before adding more color or effect choices.
The fine vs chunky glitter acceptance note should describe what happened in the finished piece: how the material covered, where reflections appeared, what the surface felt like and how much correction was needed. Link that note to surface build, because a visually acceptable result can still be impractical when the neighboring production condition changes.
What to write on the sample record
A fine vs chunky glitter sample record does not need laboratory formatting. It needs enough detail for another person to repeat the piece without guessing. Give it a short code and date, then record the product ID, coverage per layer, surface build, measured addition, application tool and the full cure or dry time.
Photograph the label beside the fine vs chunky glitter sample. Take one image in ordinary room light and another that reveals placement control. Do not edit candidates separately; if exposure or white balance changes, apply the same correction to the complete comparison.
Finish with a decision tied to sealing and sanding time. “Approved” is weaker than a note that names the base, loading and number of finishing layers. A rejection should be equally specific. Those sentences turn this particular sample from an attractive exercise into usable purchasing evidence.
A sample method that produces useful evidence
For this fine vs chunky glitter test, prepare two or three candidates rather than a crowded board of near-duplicates. Label each cup, card or mold before opening the glitter. Measure the medium and the added material, change one of the five recorded variables at a time, and keep a control when compatibility is part of the question.
- Photograph the loose particles beside their product codes.
- Apply each candidate over the real base at the same measured loading.
- Record working time, placement behavior and any settling or floating.
- Inspect after the complete cure or dry period in direct and diffuse light.
- Retain the chosen sample and write down why the others were rejected.
Useful fine vs chunky glitter rejection notes name the observed failure: too dark over the base, insufficient reflection at normal distance, exposed edges after the planned finish, visible color bleed, or too much hand placement. “Did not work” gives the next sampling round nothing to build on.
Products to use as comparison points
The products below are not a universal fine vs chunky glitter ranking. They are live catalog examples selected because their particle format or documented use helps illustrate choose the largest particle the surface and finishing schedule can carry, then use smaller particles only where coverage needs help. Open each product page, confirm the current specification and availability, then make or request a small application sample before scaling.
Compare fine, standard, mixed and shaped cuts
Use these products as practical reference points when comparing particle size, surface coverage and finish.
0.2mm Holographic Black Extra Fine Glitter (Ultra-thin) LB01000
Price range: $2.99 through $27.99
View options 
0.8mm Hexagon Cosmetic Grade Holographic Brown Glitter SLG012
Price range: $3.99 through $89.99
View options 
General Mixed Holographic Black Glitter Hexagon Shaped LB01000
Price range: $2.99 through $45.99
View options 
Three mistakes worth catching early
Selecting from a close-up photograph
Selecting from a close-up photograph is especially relevant to fine vs chunky glitter. This usually happens when the visual effect is chosen before the application has been defined. Reverse the order: establish the system, then compare effects that can work inside it.
Ignoring the clear coat needed above large particles
Ignoring the clear coat needed above large particles is especially relevant to fine vs chunky glitter. The missing condition often appears later as extra finishing work, inconsistent batches or a result that changes under normal lighting. Put that condition into the sample plan.
Calling a mixed-size blend chunky without checking its distribution
Calling a mixed-size blend chunky without checking its distribution is especially relevant to fine vs chunky glitter. A loose sample can still look excellent while the finished object fails the brief. Approval belongs to the finished construction and the recorded product code.
Questions readers ask before ordering
Which glitter size produces the smoothest finish?
Fine glitter usually creates less surface relief and is easier to cover, although particle thickness, loading and the finishing system still affect the final profile.
For this fine vs chunky glitter decision, confirm the answer against the exact product and sealing and sanding time. Keep that result with the coded sample rather than relying on memory.
Does chunky glitter always sparkle more?
Chunky glitter creates larger individual flashes. Fine glitter creates many smaller reflections and can look denser. The more effective result depends on viewing distance and lighting.
For this fine vs chunky glitter decision, confirm the answer against the exact product and sealing and sanding time. Keep that result with the coded sample rather than relying on memory.
Can fine and chunky glitter be mixed?
Yes. A measured mixed-size blend can combine coverage with visible highlights. Record the ratio if the appearance must be reproduced.
For this fine vs chunky glitter decision, confirm the answer against the exact product and sealing and sanding time. Keep that result with the coded sample rather than relying on memory.
Which size is easier to use on tumblers?
Fine and standard cuts generally need less leveling. Chunky cuts can work well for statement designs when the topcoat schedule allows complete encapsulation.
For this fine vs chunky glitter decision, confirm the answer against the exact product and sealing and sanding time. Keep that result with the coded sample rather than relying on memory.
A concise buying brief
For a fine vs chunky glitter inquiry, send the supplier the intended application, base or binder, preferred size range, shape, finish, color family, required quantity, packaging and destination. Ask for the exact product code and documentation relevant to sealing and sanding time. Verify any marketing or compliance claim for that product and market before publishing it.
Use the GlittersMall shop to compare products for fine vs chunky glitter. The Glitter Guides explain material and size decisions; the Glitter Applications library continues into process-specific work.
Editorial note: This fine vs chunky glitter guide organizes selection and sampling decisions from the current GlittersMall catalog. It does not replace the instructions or approval of the relevant resin, coating, cosmetic or adhesive manufacturer. Product claims and suitability must be checked for the exact item and intended market before publication or production.